How to project
A connection contains three transfer objects at least: a source, a destination and a trigger that triggers the transfer should its conditions occur. You can define a free number of sources and destinations which can be accessed in multiple steps. You can define several triggers as will. Triggers might be linked with AND or OR, triggering either if all conditions occur or if at least one condition occurs.
The transfer objects may be found in the right-hand toolbox.
Right mouse-click on a transfer objects with in project allows editing, copying, pasting, cutting, deleting.
Note: To project a connection, all plug-ins needed have to be configured.
- Create a new connection.
- Give your connection a suitable name.
- Choose the transfer object you want to define as source from the toolbox “Transfer Objects” (e. g. “OPC UA/DA” if you want to read data from an OPC Server).
- Place the source in the connection (main window) per drag and drop.
- Open the transfer object with double-click.
- Set the properties. The properties of the transfer objects are explained in the next chapters.
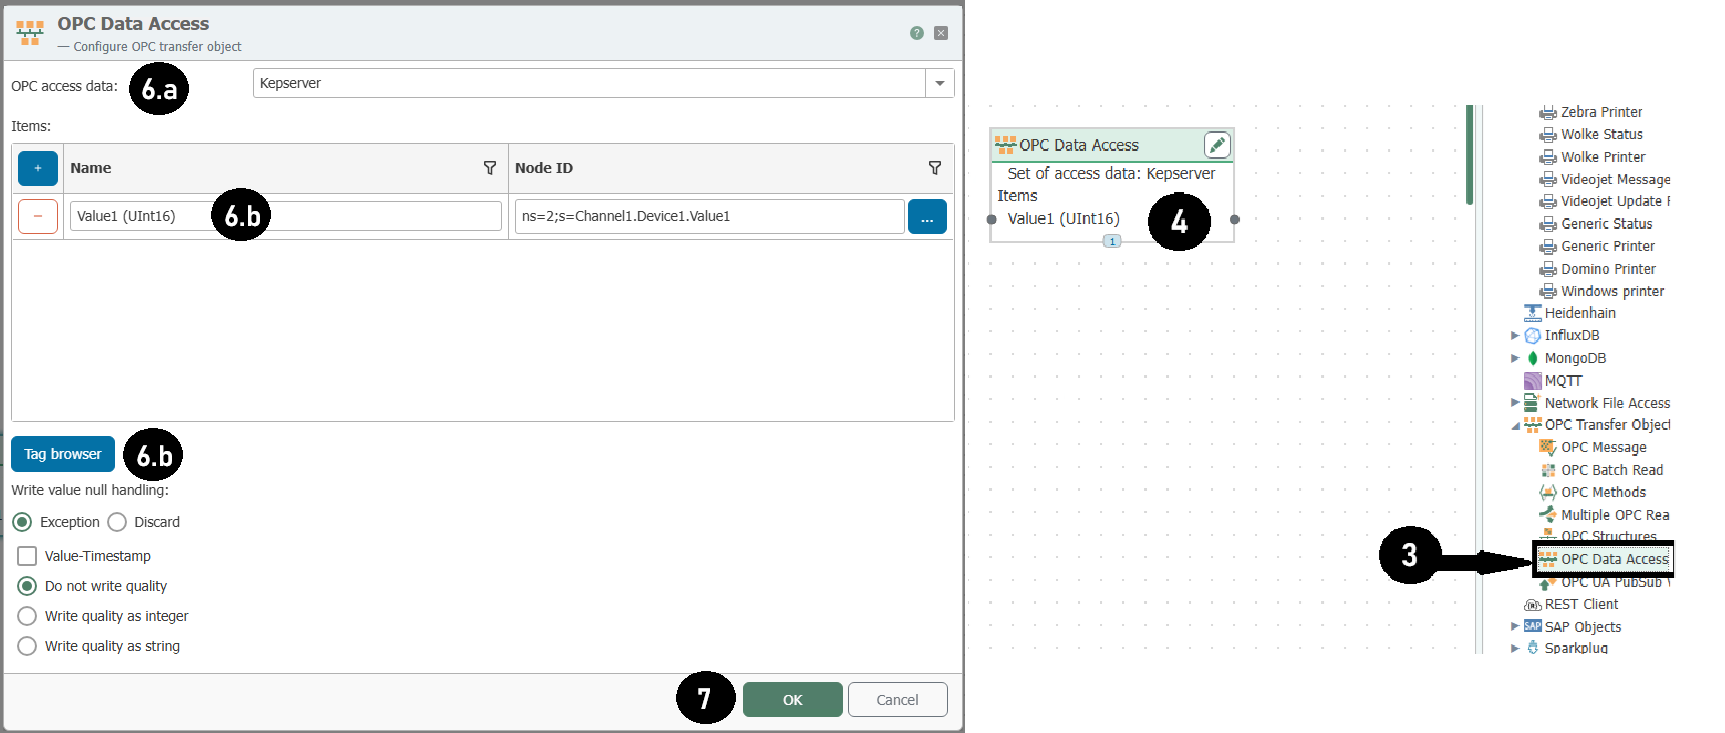
- Selection of the OPC connection.
- Alternatively: Enter data points’ name or open the tag browser.
- Transfer data points to the transfer object by double-clicking.
- Confirm with “OK”.

OPC Data Access Transfer Object Configuration
- Project a destination, e. g. a database transfer object.
- Choose the DB transfer object from toolbox “Transfer Objects”.
- Place it within projection area.
- Open transfer object with double-click.
- Choose a set of DB access data.
- Choose a type for this transfer object. If database servers as destination, that would be either INSERT or UPDATE. Choose INSERT in this case.
- Choose the table you want to write to.
- Choose the columns you want to write to. Sort with “Up” and “Down” to keep the overview in the configuration.
- Confirm with “OK”.
.png)
Database Transfer Object Configuration
Tip: Copy/Paste is possible in the projection of the transfer objects.
- Drag connections arrows between transfer object items of the source and of the destination. Click onto the source’s item, hold mouse button down, drag over destination item. Drop by releasing mouse button. Finished! You can delete a connection arrow by right-clicking the arrow and clicking “Delete”. At this point you also have the possibility to delete several connection arrows at once. To do this, go to the entry “Delete several” and select an option.
.png)
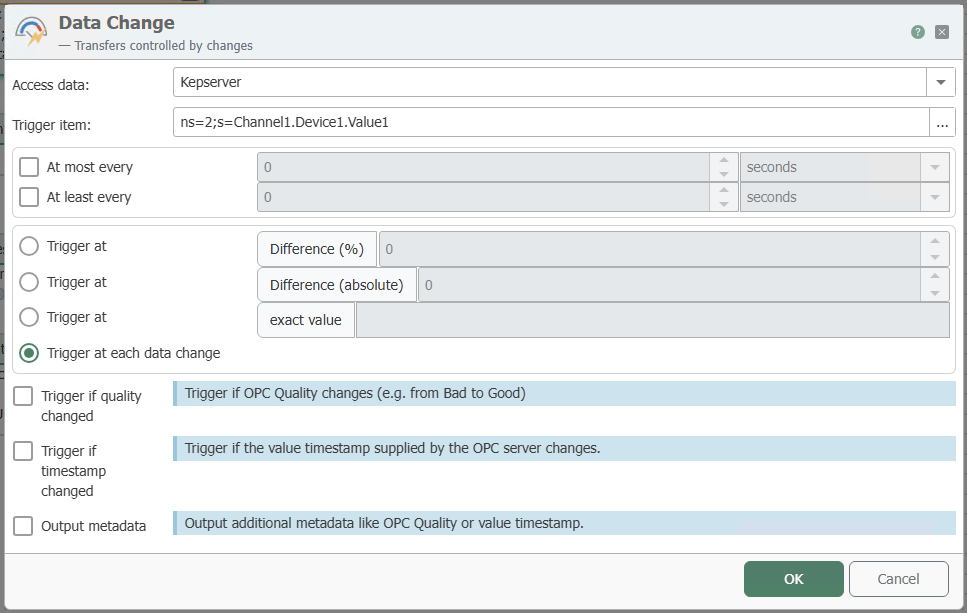
- Configure a trigger:
- Choose a trigger from the toolbox.
- Place it within projection area.
- Open with double-click.
- Configure the trigger.

Data Change Trigger Configuration
Tip: Press “Shift” to drag all columns from a transfer object to a single column of the other transfer object.