Snowflake Transfer Status Trigger
The Snowflake Transfer Status Trigger initiates a transfer when a value in the monitored table is marked as not yet transferred.
Once the transfer is complete, the record is marked as transferred or as failed. Failed transfers can optionally be retried any number of times using an additional counter.
For the Snowflake Transfer Status Trigger to work, the monitored table must have a primary key.
Trigger behavior

The diagram shows the flow via the marker column including failure and retry.
Dialog Overview
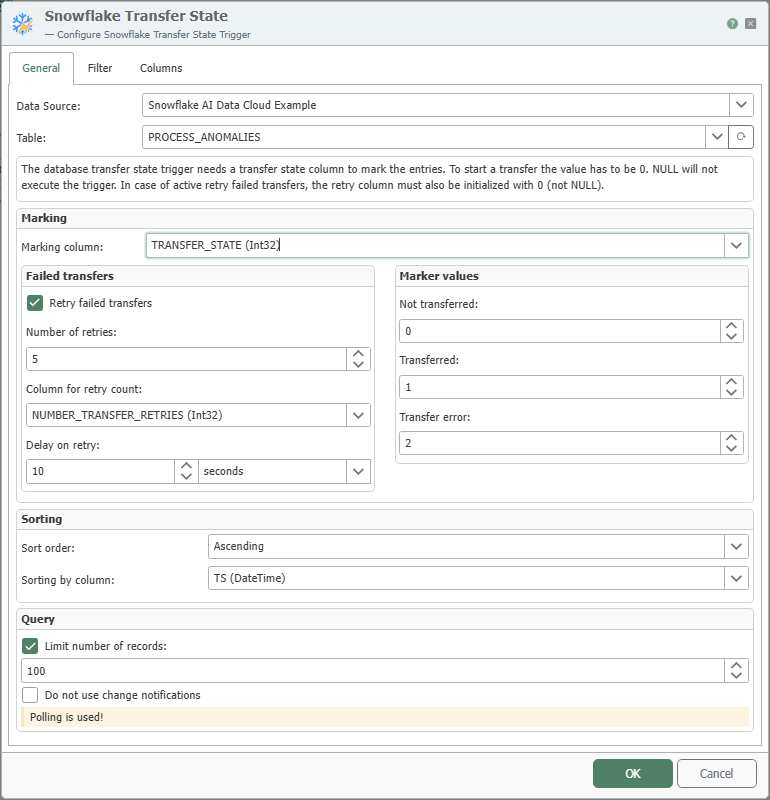
General Properties
| Term | Explanation |
|---|---|
| Data Source | All Snowflake connections created in the Plug-ins section are available for selection here. If the desired connection does not yet exist, you can set it up in the Plug-ins section as the “Snowflake AI Data Cloud” plug-in. |
| Table | Table to be monitored. |
| Marker Column | Column in the table where the transfer status is stored. The column must be initialized with 0 or another configured value for “Not transferred.” It does not work with NULL. |
| Marker Values | You can define your own values for the various transfer states here. |
| Retry Failed Transfers | If this option is enabled, failed transfers will be retried as many times as specified. |
| Number of Retry Attempts | Specifies how many times failed transfers should be retried. |
| Retry Column | Column in which the number of retries is incremented. Note: The column must be initialized to 0. It does not work with NULL. |
| Retry Delay | The amount of time to wait before retrying a transfer. |
| Sort Order | Here you can specify how the values should be sorted. If “None” is selected, no sorting will occur. |
| Sort Column | The column by which the data should be sorted. |
| Limit Number of Records to | If this option is enabled, you can set the maximum number of records to be transferred at one time. |
| Do not use change notifications | If this option is enabled, the polling interval specified in the plugin is used for queries, even for databases with change notifications. |
Filters
The structure and operation of the Filters tab are described in detail under Filters and Filter Groups. For the trigger, the filter values are entered as fixed values.
Columns
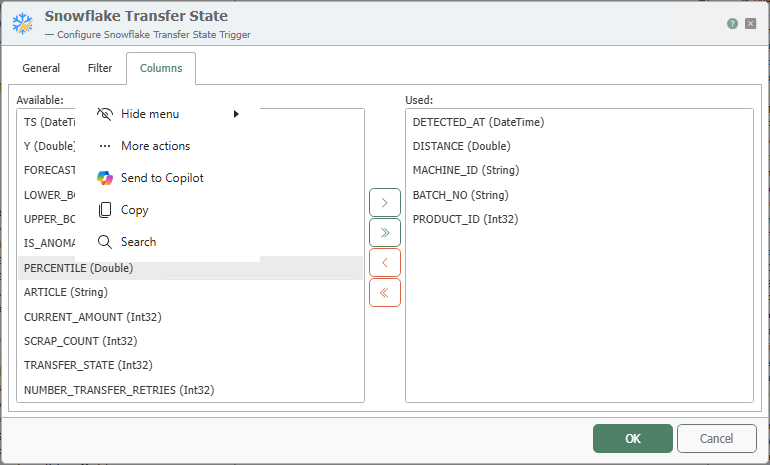
Here, you can select the columns whose values are to be used in the connection. Columns can be added or removed from the list of available and used columns either by double-clicking or using the buttons.