Database to other systems
If you want to transfer data securely, it has proven effective to do so using a handshake procedure. For databases such as Microsoft SQL Server, the "Mark transferred values" function is ideal for this purpose.
This function records the status of the transfer in a column of the table. The following statuses are defined by OPC Router:
0 Not transferred
1 Transferred
2 Error during transfer
It makes sense to configure the transfer column in the underlying table so that it does not allow zero values and accepts "0" as the default value.
Of course, the value does not have to be "0" by default (transfer pending), but can also be set to "1" (transfer not pending) by default. In this case, it can then be updated to "0" in a later process, for example, by an operator action, when a transfer is to take place.
This usually means that applications that are to be connected and to which this column is added continue to run without errors, as the SQL server can automatically fill this column with a value during an insert. The OPC Router knows that this data record has not yet been transferred and transfers it in the next cycle.
You can add multiple transfer status columns to a table if you want to use the same data record in different process steps.
This is helpful, for example, if you want to print a data record at different stations, etc.
Repetition in case of error
With the Select Transfer Object and the Transfer State Trigger, the OPC Router supports the option of repetition in case of error, for example, if the target system is not available. To do this, use an additional column to record the number of errors. This automatically aborts the transfer when an error threshold is exceeded and marks the data set as finally faulty. In addition, a time delay can be set for repetition in case of error.
It is possible to activate an alarm for faulty transfer states via an additional OPC Router connection.
Step-by-step configuration of a transfer column handshake
-
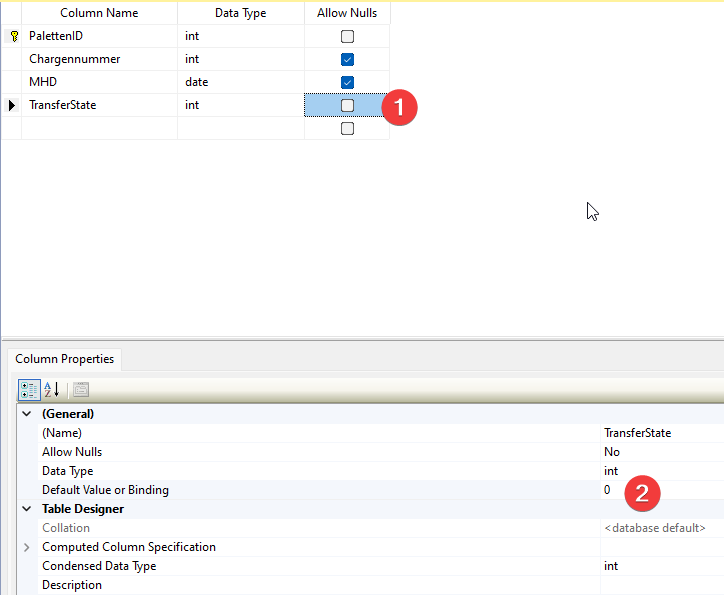
Add an additional column "TransferState" to your table and set the default value to 0 (2) without allowing zero values. (1)\
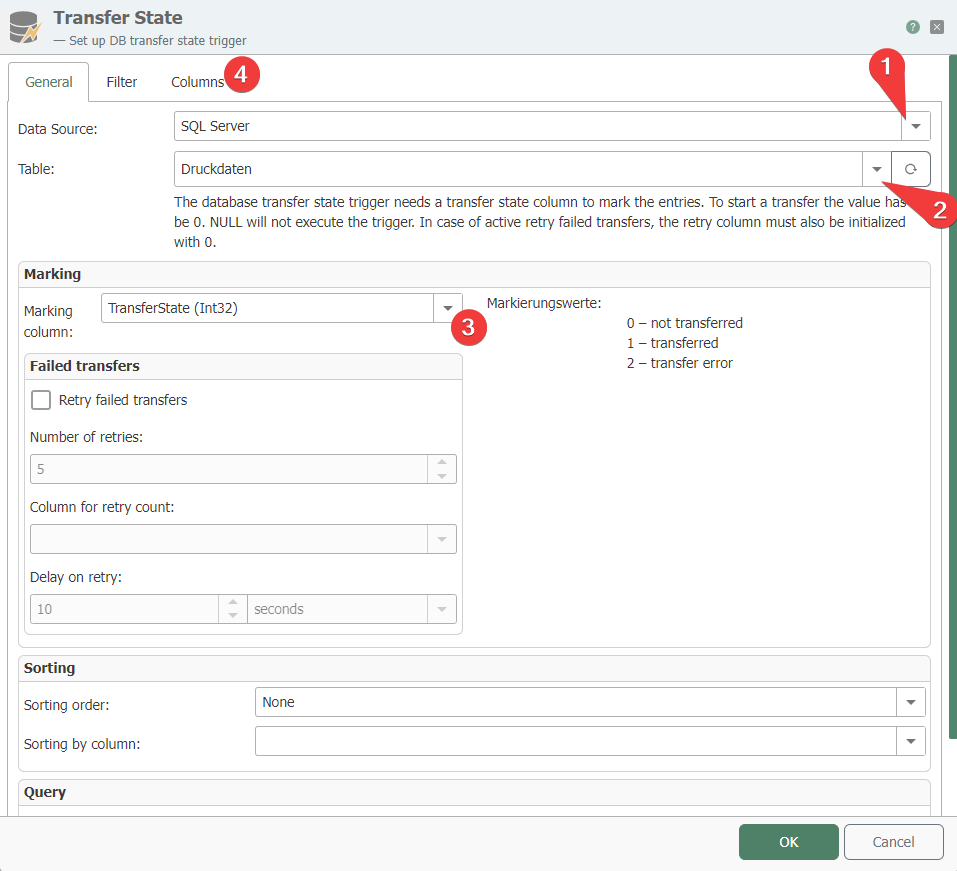
- Add the Transfer State Trigger to your OPC Router connection and double-click to open it for editing. Select your database (1) and your table (2). Then select the "TransferState" column you just created to highlight it (3) and switch to the "Columns" tab (4).
-
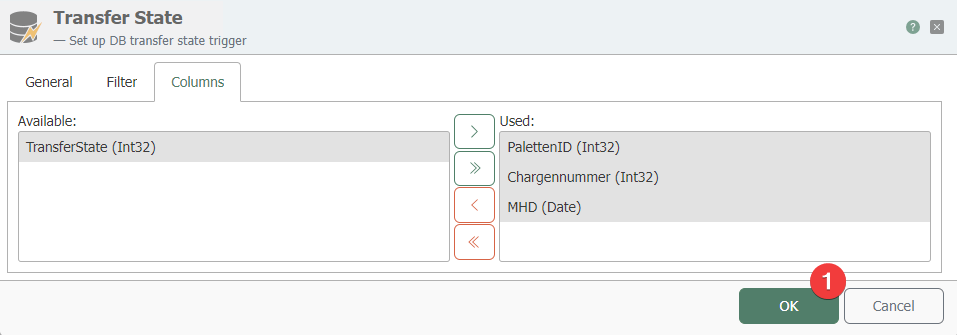
Select the columns you want to use and click OK to save the trigger with the settings. (1)
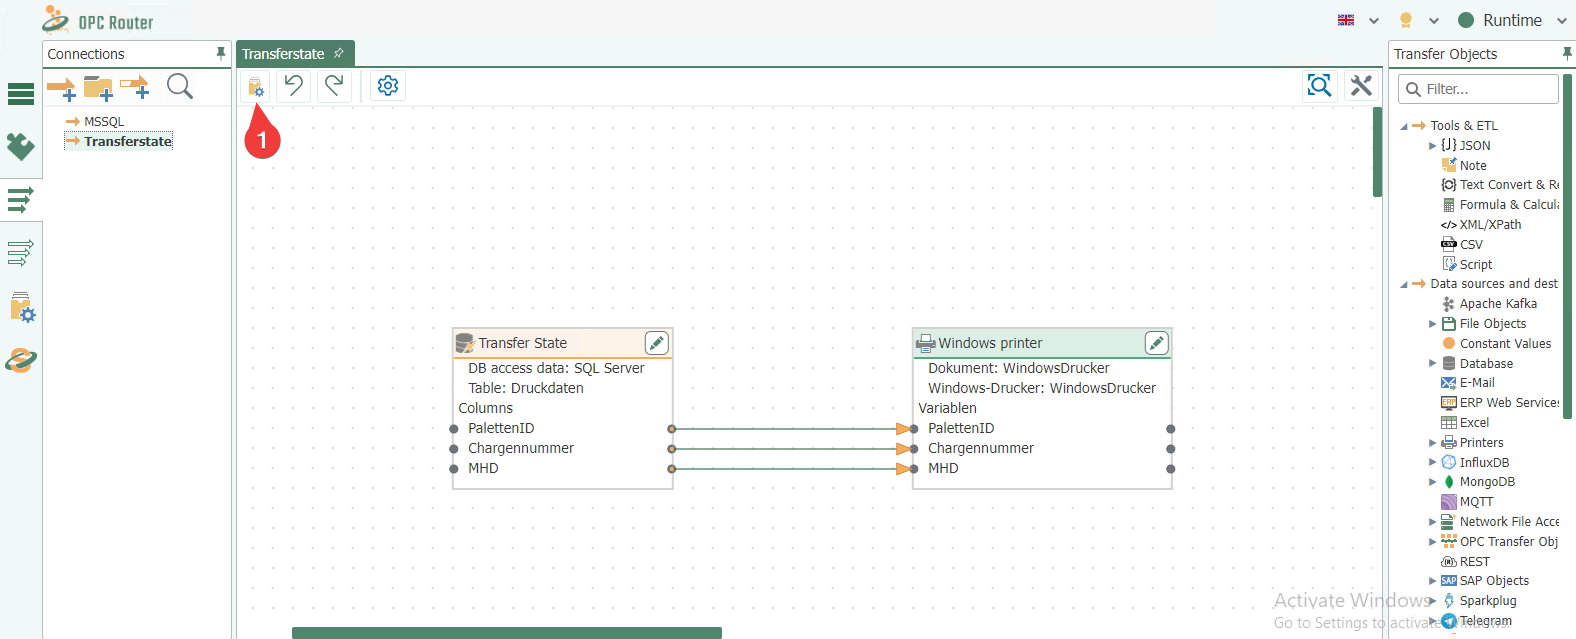
- As an example, we send our print data to our Windows printer and activate production. (1)
- If we now write data to the table and the transfer state is set to 0, the connection is triggered and the data is successfully sent to our printer.
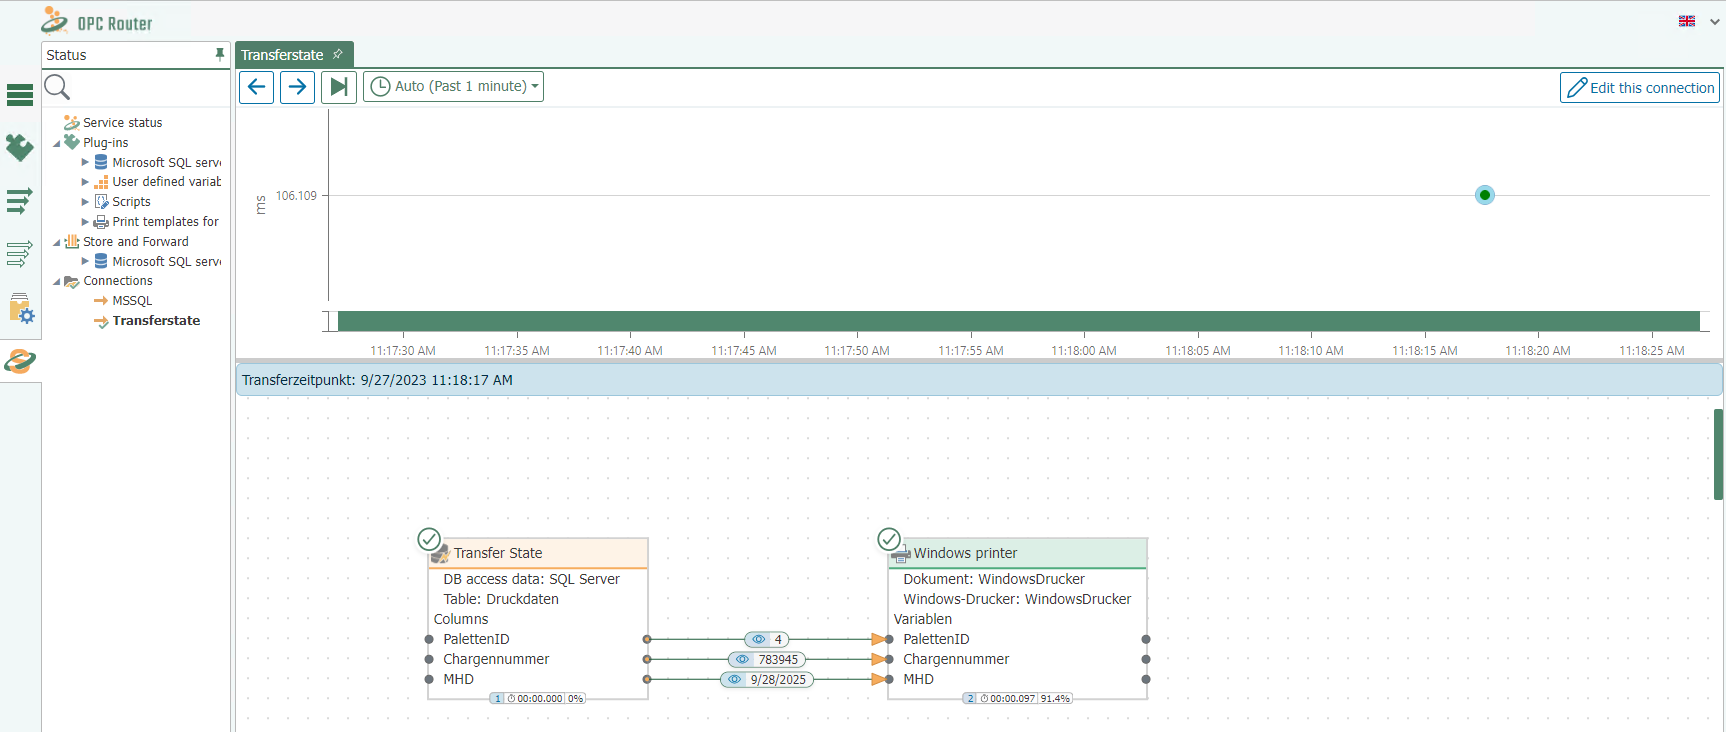
- We can now also see this in Microsoft Management Studio, because our data has been marked with Transfer State 1 ??? i.e., it has been successfully transferred.
