Troubleshooting and Migration to Secure Redundancy
Starting with version 5.4, Legacy Redundancy is no longer supported. To ensure seamless and secure communication, all your instances must use the same redundancy version. Please note that the different redundancy versions are not compatible with each other.
Secure Redundancy uses a shared pre-shared key, thereby enabling secure, encrypted communication between the primary and secondary services. If you have been using Legacy Redundancy, you should carefully review this guide for migrating to Secure Redundancy.
This page supplements the actual configuration of Redundancy. It describes how to set up Secure Redundancy for new configurations and migrations, as well as common errors related to connections, certificates, and the pre-shared key.
Notes on Setting Up Secure Redundancy for Migrations and New Installations
Primary Service
The actual configuration is described in the current dialog under Redundancy. For new configurations and migrations, it is particularly important at this stage that you first generate the pre-shared key and then store it consistently in both systems.
In the Pre-Shared Key section, first click the Generate button. This will generate a new key value. Then copy this value to the clipboard and paste it into the key pair to be used on both the primary and secondary services.
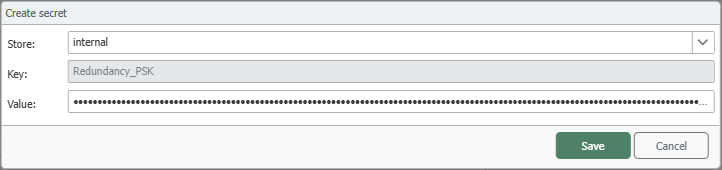
In the edit dialog, the key is created in the internal store. Use a unique Key and enter the previously generated value in Value. Then save the entry to use it for the current OPC Router instance.
The pre-shared key can also be generated via the “secondary service.” It is important that you use the same pre-shared key on both the primary and secondary services.
Secondary Service
Next, configure the secondary service according to the current description in Redundancy. Make sure that the same pre-shared key is used and that the secondary service can access the primary service’s web management interface.
Deploy the changes to both the primary and secondary services. You can then test the connection to verify that the secondary service can reach the primary service. The secondary service should then remain in the Standby state until the primary service becomes unreachable.
Troubleshooting
Address or DNS name cannot be resolved
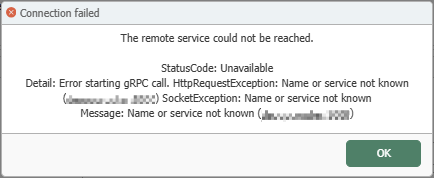
If you receive this error message during the connection test, the configured hostname or DNS name cannot be resolved.
Verify that you are using the correct IP address or DNS name in the proper format.
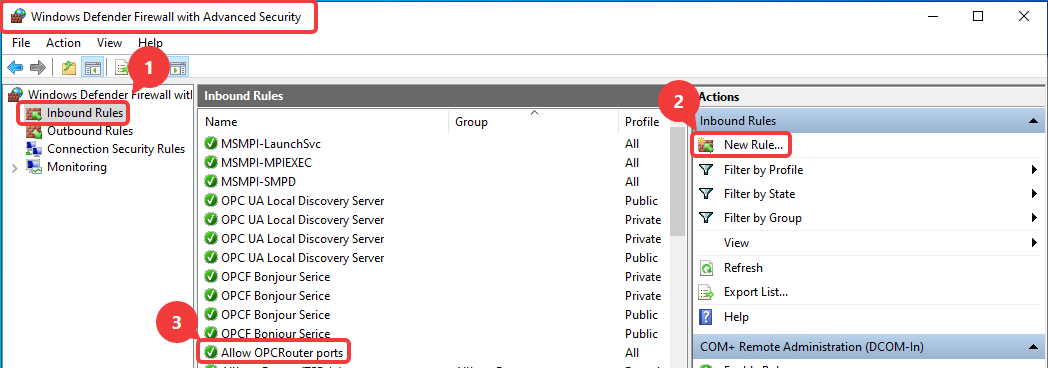
If the OPC Router is running in a Docker environment with an internal network, the Docker name is used as the address there.
Port is unavailable
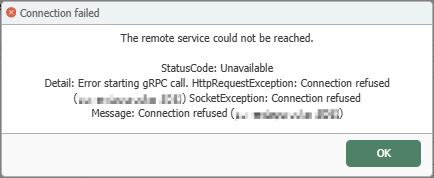
This error message may appear if the address (IP / DNS name) is correct, but the service is not running on that port.
Verify that you are using the correct port, that the service is actually listening on that port, and that no firewall is blocking the connection.
For internal Docker communication within the internal network of a Docker environment, you must use the internal port rather than the exposed port. For example, if Docker is exposed with the port mapping -p 8083:8080, then port 8080 is accessed within the internal network.
Pre-shared keys differ between the two services

This error message may occur if the pre-shared key differs between the primary and secondary services or if it was not stored consistently in the internal store.
Simply generate the pre-shared key on the primary service, copy it, and then paste it exactly as is into the secondary service.
Be sure to publish the changes on your primary service after generating the new pre-shared key before retesting the connection.
Certificate Issues (HTTPS)
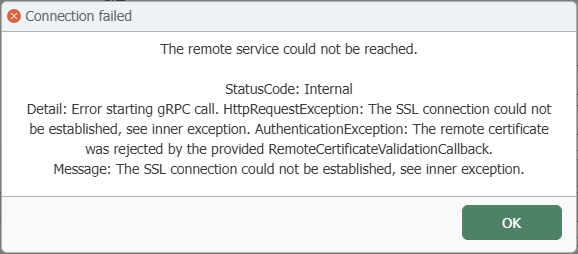
This error message may occur if you are using HTTPS for the primary service but the associated (possibly self-signed) certificate is not yet available as trusted on the secondary service.
If a self-signed certificate is used on the primary service, you can export the selected certificate from the certificate management console without the private key and then import it onto the secondary service.
Next, on the secondary service, select the certificate store through which the certificate should be made available as trusted:
- Router: Import the certificate into the OPC Router’s Certificate Manager and, in the redundancy settings under Trusted Certificates, select the Router option.
- Windows: Import the certificate into the Windows certificate store and, in the redundancy settings under Trusted Certificates, select the Windows option.
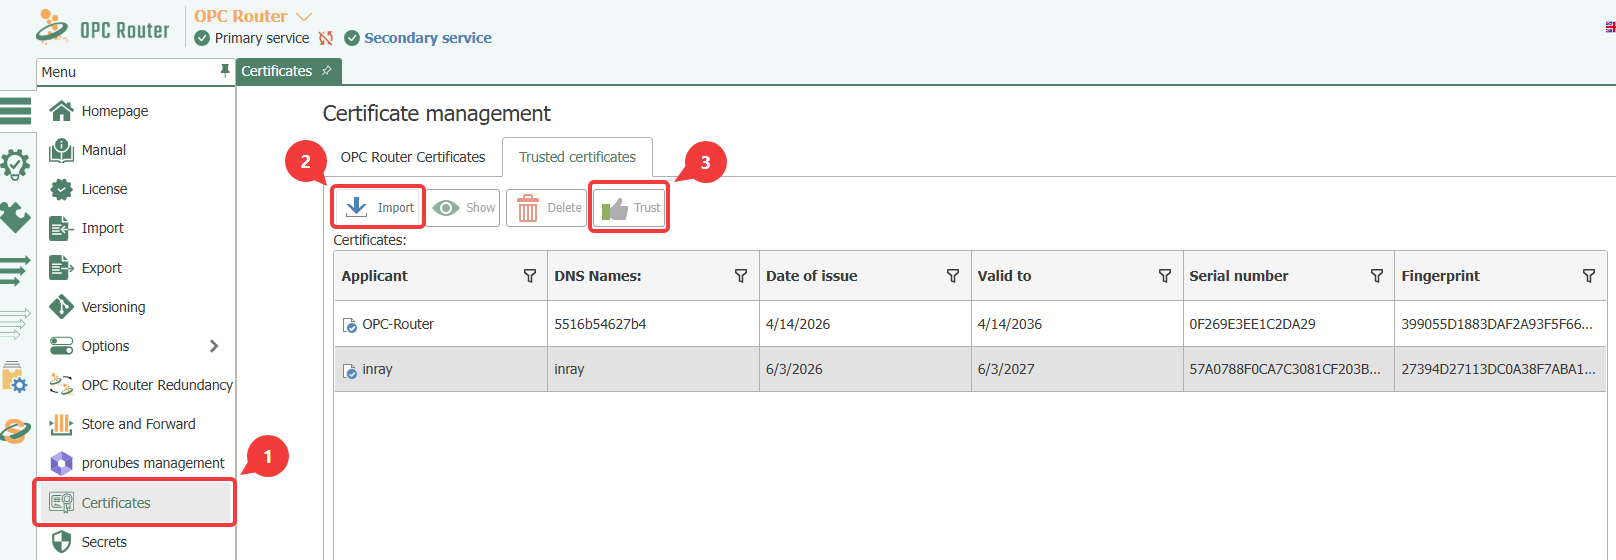
If you are using the OPC Router certificate store, follow these three steps on the secondary service:
- Open Certificate Manager via the Certificates menu item.
- Select Import in the OPC Router Certificates tab and import the certificate used for HTTPS on the primary service.
- Then mark the imported certificate as trusted by selecting Trust.
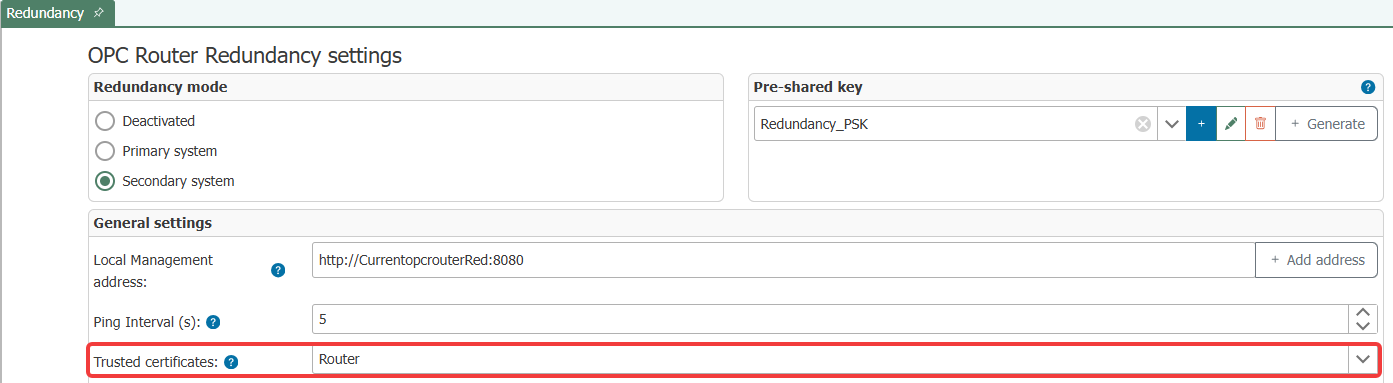
The following screenshot shows an example of the Router setting in the redundancy settings.
If the primary service uses HTTPS, 5001 is often used instead of 5000 on Windows installations. For Docker containers, port 8443 is used internally by default; port 443 is typically exposed externally. Therefore, always check the firewall rules and the actual internal or exposed port being used.