Telegram Plug-in
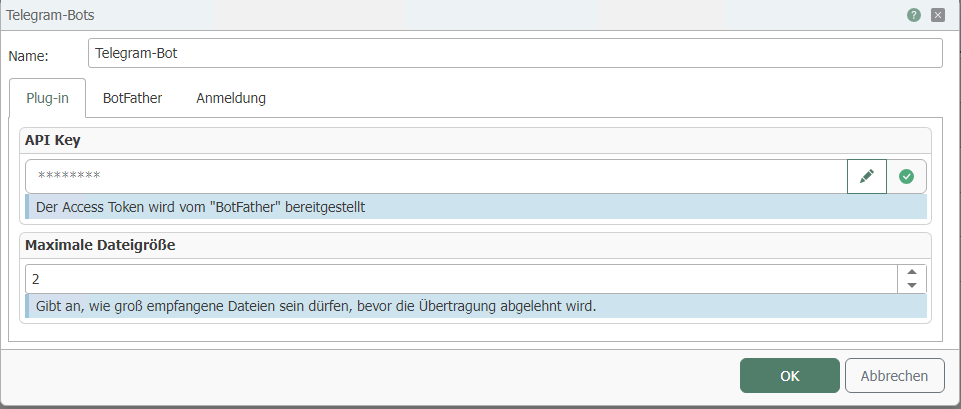
You can set the following properties in the configuration of the Telegram Bot plug-in:
| Property | Description |
|---|---|
| Name | Assign any unique name for your connection. |
Section: Plug-in
| Property | Description |
|---|---|
| Bot Access Token | The access token is provided by the “BotFather”:
|
| Maximum file size | The maximum file size specifies (in MB) the maximum size of received files before the transfer is rejected. |
The BotFather is used to manage Telegram bots. You can use BotFather to create, edit, and delete bots. Once you have created a bot, BotFather will provide you with the access token. You can retrieve the access token from BotFather at any time. The account that created a bot is the non-transferable owner of the bot. This section is for information purposes only; you do not need to enter anything in this area.
Section: BotFather
| Property | Description |
|---|---|
| Help text | If you want to display automatic suggestions of possible commands to users, proceed as follows:
|
Telegram bots are always displayed publicly and can be addressed by any Telegram user. Internal authentication filters out unauthenticated users before the triggers are activated.
Users can be manually authenticated after they have written to the bot (/start) or authenticate themselves using a previously generated confirmation code.
| Property | Description |
|---|---|
| Authentication Method | Select the desired authentication method:
|
Messages can only be sent to users who have already sent at least one message to the bot. Messages intended for everyone are sent to all registered users (including those who are not authenticated). However, a maximum of 30 messages per second may be sent (Telegram API limit).
Section: Registration
| Property | Description |
|---|---|
| Authentication method |
|
For internal authentication method
Section: Known users
| Property | Description |
|---|---|
| Known Users | List of known users. Use the “Delete user” button to remove a user from the list. Use the “Revoke Permission” or “Grant Permission” buttons to revoke or assign permissions to known users. |
Confirmation key section
| Property | Description |
|---|---|
| Verification Key | Displays the known verification keys. Use the “Delete registration code” and “Create validation code” buttons to remove verification keys from the list or add new ones. |
For FAS login authentication method
Section: Database
Here, connect the plug-in instance that can access the FAS login database.
Section: Email
Here, connect the plug-in instance that will be used to send registration emails.
Enter the sender address in the field and edit the email text.
Confirm your entries by selecting “OK” (Confirm).
The following edit bots are helpful:
- /setname - to change a bot name
- /setdescription - to change a bot's description
- /setabouttext - to change the bot's info
- /setuserpic - to change a profile picture
- /setcommands - to change the command list
- /deletebot - to delete a bot
- /setjoingroups - the bot may be added to groups
- /setprivacy - the bot may see/read messages in groups