Printers
You can use the respective printer plug-in to define document templates/print templates with label fields in the OPC Router. The content of the label fields can be dynamically passed at runtime.
In addition to the Windows printer plug-in, the following printer plug-ins are available:
- Domino printer plug-in
- Plug-in for generic printers
- Wolke printer
- Zebra printer plug-in
- Videojet printer
The following steps are required:
- Create the document template in the plug-in configuration
- Select the printer and populate the template variables with values in the flow configuration
Creating the Document Template
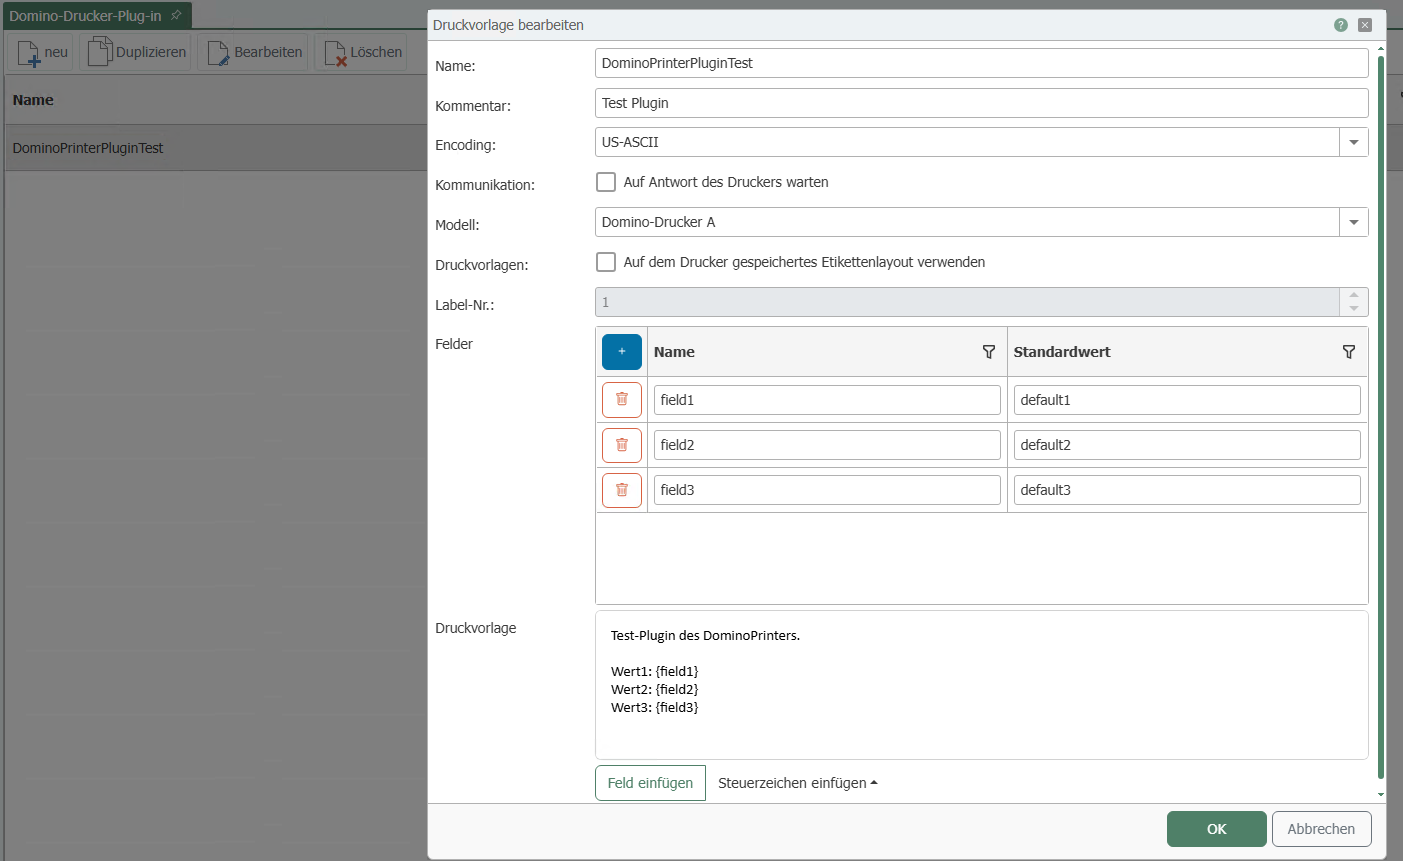
- Open the appropriate printer plug-in (Domino, Zebra, generic printer) in the “Print templates” section under the “Plug-ins” menu.
- Select “Create new label” or double-click an existing entry to edit a template.
- Assign a name to the print template and enter a comment if necessary. For a Wolke printer label template, you must also enter the label name.
- Specify the data for the print template.
- Confirm your entries by clicking “OK”.”
The document template is now available for use in designing a flow.
Domino and Zebra Printer Plug-ins: The fields are replaced with the corresponding strings in the before the label is sent to the printer. Either the default value from the table is used, or a flow is read, e.g., via a script.
Generic Printer Plug-in: During configuration, either the default value from the table is specified, or a flow is read—for example, via a script.
Videojet Printer plug-in: No print template is defined here; instead, only the default values for various labels are specified, which can be sent to the print template available in the printer. In the transfer object “Videojet Update Printer”, you can select a label from the drop-down menu in the “Label” field.
Defining Printer Templates
Template variables are populated dynamically or statically at runtime with values, such as those from the controller or batch and job data from the database. Here, you define the required placeholders and assign default values if desired.
- Assign names to the label fields in the table. To do this, simply click in the next available row. To delete fields, go to the corresponding row, right-click, and select “Delete row”.”
- If necessary, assign a default value to your label fields.
- Define your label printing below the fields in the print template. Here, you can drag and drop individual fields into the print template. You can also select the fields by right-clicking and choosing “Add to label”,” or you can highlight the field, place your cursor at the correct location in your print template, and click the “Insert field” button.
- Confirm your entry by clicking “OK”.”
To delete a print template, select it from the list and click the “Delete label” button at the top.
To rename an existing print template, select it from the list and click the “Rename label” button at the top.
Using the “Insert control character” button, you can also insert control characters into the label description for Domino, Zebra, and generic printers. The control characters are highlighted in black.