Design Flow
Flows require at least three transfer objects: a data source, a data destination, and a trigger that initiates the transfer. You can add as many sources and destinations as you like to the flow, which can also be accessed in multiple steps. It is also possible to define multiple triggers. The triggers can be linked using AND or OR, meaning they initiate the transfer if either one or all conditions are met.
The required transfer objects (“Sources and Destinations,” “Triggers”) can be found in the tool palette on the right side of the window.
Within the design area, you can edit, rename, and delete transfer objects using the context menu (right-click).
To define the flow, all required plug-ins must be configured.
If you need many flows with similar structures, it’s best to create them using templates and instances rather than designing each flow from scratch.
-
Create a new flow.
-
Give your flow an appropriate name.
-
In the tool palette “Transfer Objects”, select the type of your source (e.g., “OPC UA/DA” if you want to read data from an OPC server).
-
Place the source in the configuration area using drag-and-drop.
-
Double-click to open the source.
-
Enter the required properties. The properties of the individual transfer objects are explained in the following sections.
- Selecting the OPC Connection
- Alternatively: Type in the data points or open the tag browser
- Add data points to the transfer object by double-clicking them.
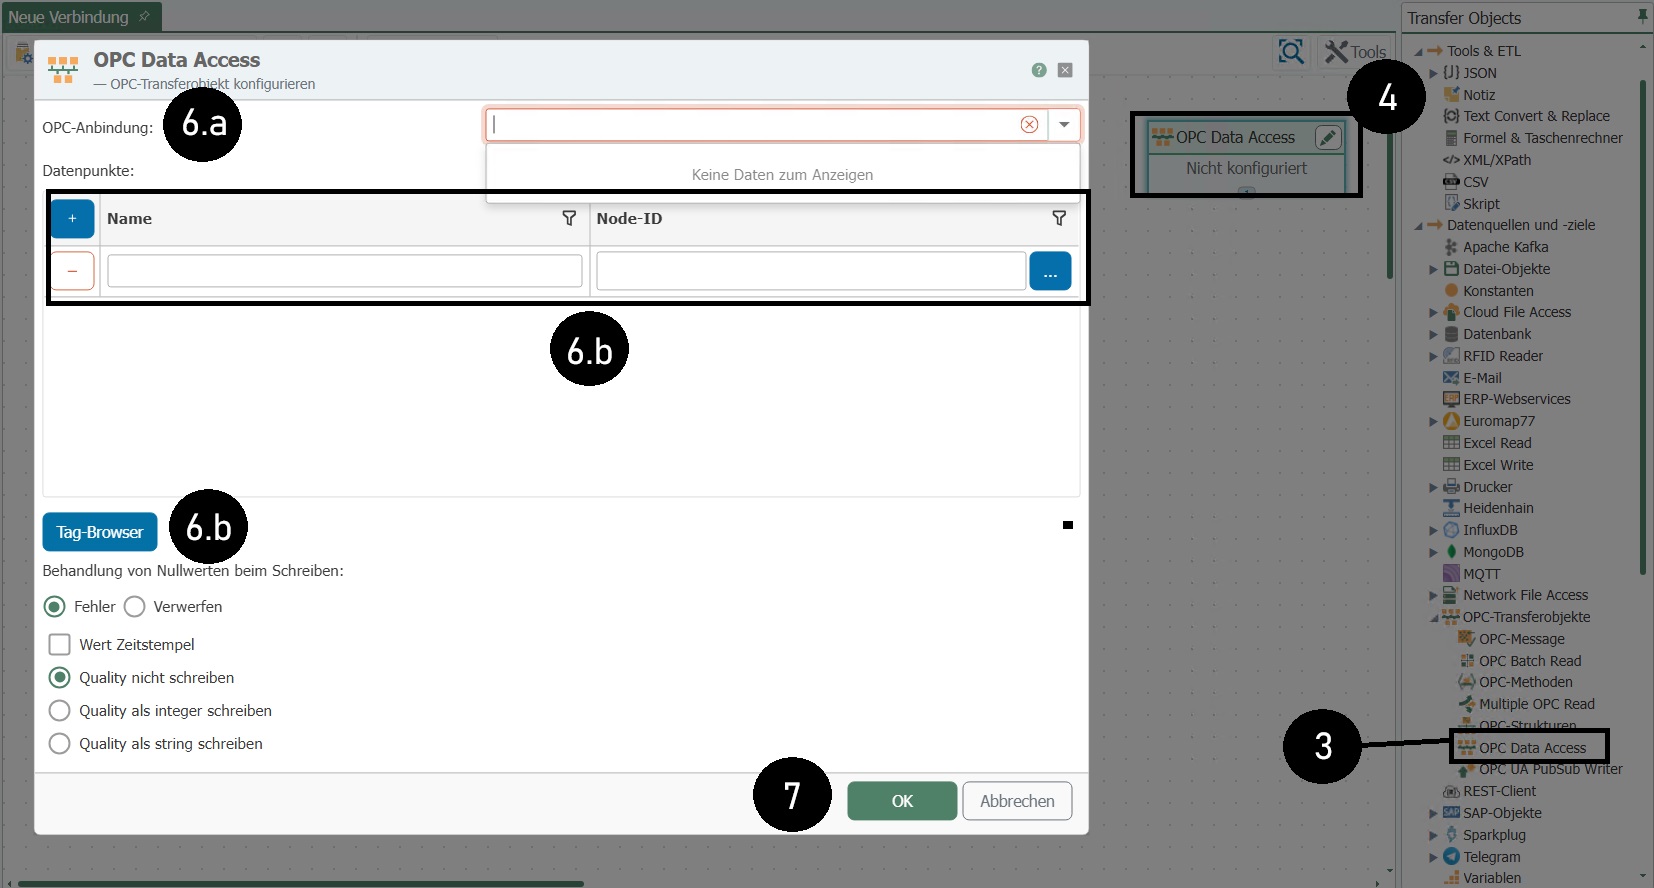 Source
 -
Click OK to confirm.
-
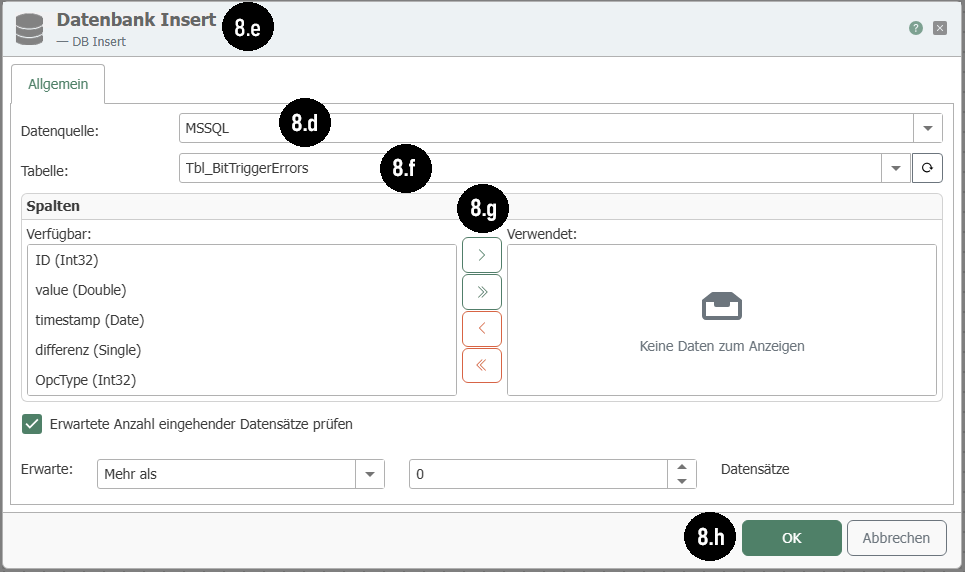
Create a data destination (e.g., a database) and define its properties (detailed instructions).
- Select the DB object from the tool palette “Transfer Objects”.
- Place it in the configuration area.
- Double-click to open the transfer object.
- Select the database connection.
- Select the type of transfer object. Since the database serves as the transfer destination here, choose either “Insert” or “Update” (of an existing record). Now: Insert.
- Select the table you want to write to.
- Select the columns you want to write to. Sort using “Ascending” and “Descending” to maintain an overview during configuration.
- Confirm by clicking “OK”.
Tip: Copy/paste is possible in the transfer object view.
-
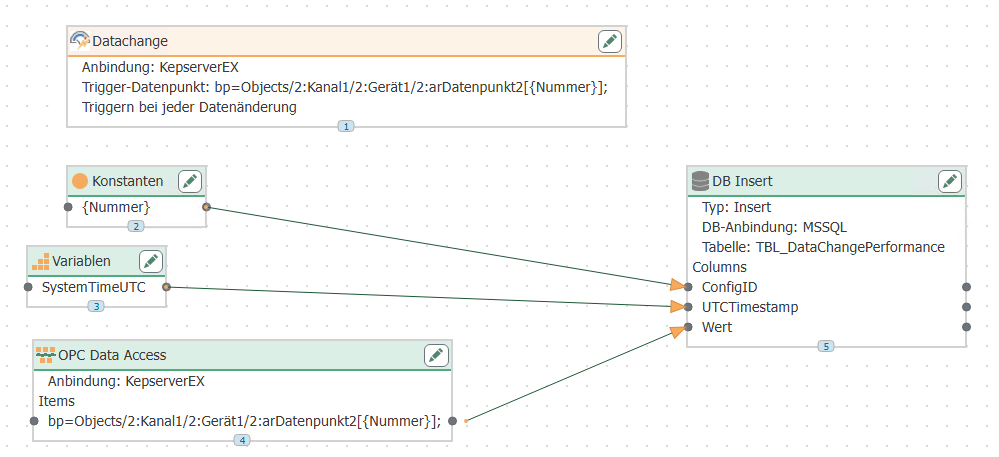
Now simply drag Item Links between the entries in the source and those in the destination. To do this, click on the entry in the source, hold down the mouse button, and drag it over the destination entry. Then release the mouse button (drag & drop).
-
You can delete an Item Link by right-clicking on it and selecting “Delete”.” At this point, you also have the option to delete multiple Item Links at once. To do so, go to the entry “Delete multiple” and select an option.
-
Finally, create the trigger that initiates the transfer.
- Select a trigger from the tool palette “Transfer Objects”.
- Place the trigger in the configuration area.
- Double-click to open the trigger.
- Configure the trigger.
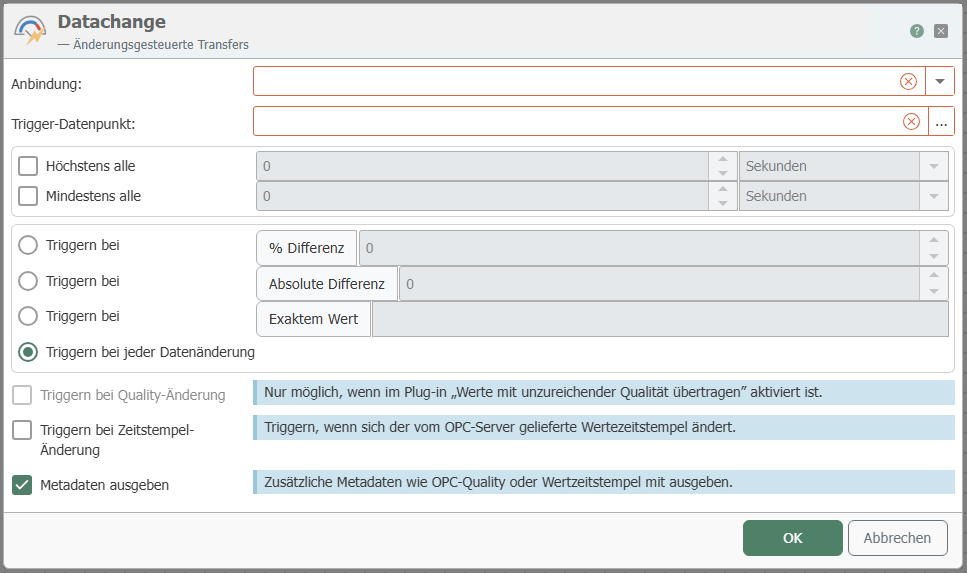 trigger
 -
Publish the engineering so that the runtime executes the flow. For instructions on how to select the pending changes and put them into production, see “Publishing.”
Press Shift to drag all columns from one transfer object to a single column in another transfer object.
Item Links
An item link does not establish a connection between two transfer objects as a whole, but rather two of their elements—for example, a data point from the source with a column in the destination. It thus specifies which value is transferred from where to where.
The OPC Router also uses the item links to calculate the order in which it processes the flow’s transfer objects: how a flow is executed.
You can drag item links one at a time or several at once. For information on the three modes offered by the “Draw Item Links” button and how automatic item sorting works, see “Creating a Flow.”