Connecting with a Bearer Token
This example shows how a Bearer token is first retrieved via a REST call and then used in a second connection for further REST calls.
Retrieving the Token
First, create the input values required for the token request. The parameters required depend on the target system. Typical examples include client_id, client_secret, scope, username, password, or grant_type.
Many OAuth 2.0 token endpoints expect a POST request for this. The application/x-www-form-urlencoded or application/json format is often used for this. In our example, we use application/json.
To do this, proceed as follows:
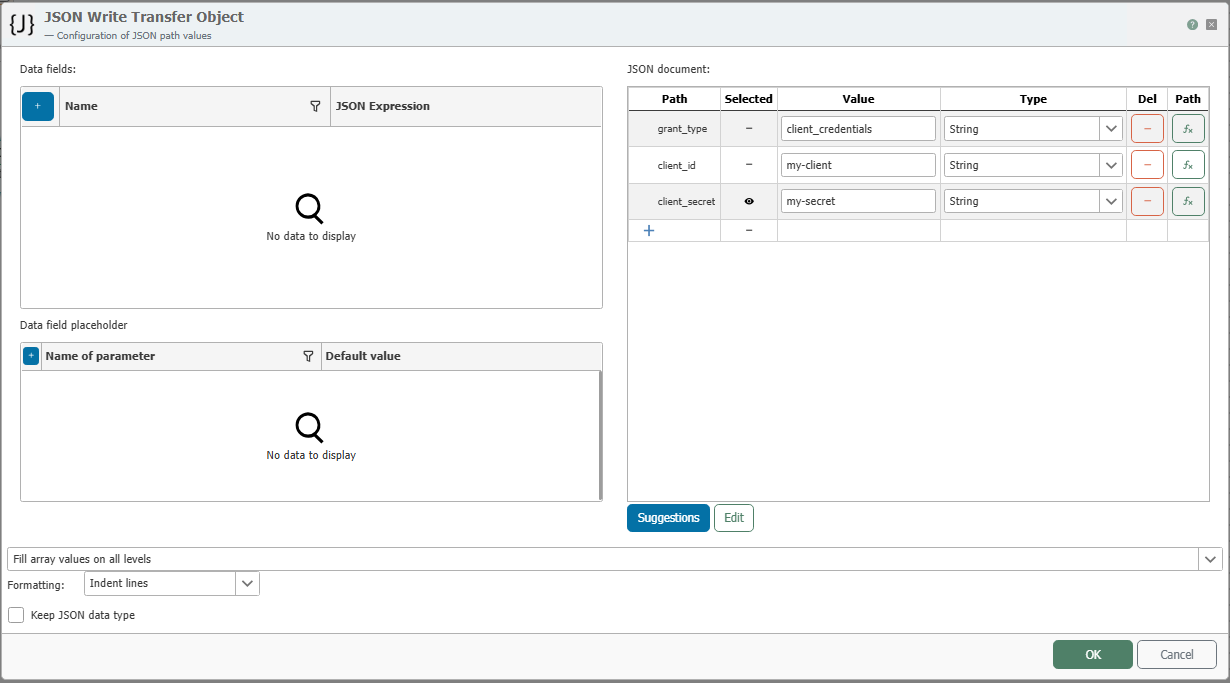
- Click the
Editbutton to insert the default JSON structure for the token request. Then clickEditagain to apply the content. In our example, the token request structure looks like this:
{
  "grant_type": "client_credentials",
  "client_id": "my-client",
  "client_secret": "my-secret",
  "scope": "api.read"
}
- Now enter the correct values for
client_idandclient_secretin theValuecolumn.
Then configure a connection using a REST client transfer object:
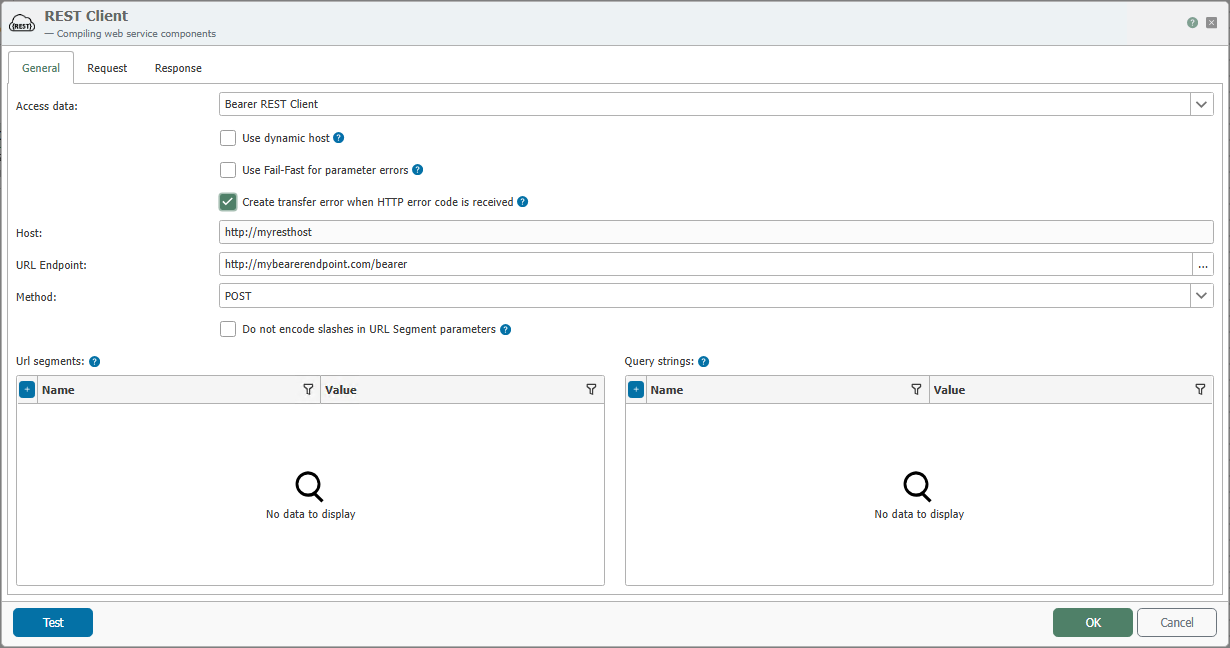
- Select the appropriate REST client connection.
- In the REST connection, set the authentication to
Noneif the token is requested via the request itself and no HTTP authentication is required. - Enter the required URL endpoint.
- Select
POSTas the HTTP method. - In the
Requesttab, select the format expected by the token endpoint. In our example,Body type = rawand the format isapplication/json. - Pass the required values by connecting the JSON parameter of the JSON Write transfer object to the request body.
Now we need the JSON Read Transfer Object:
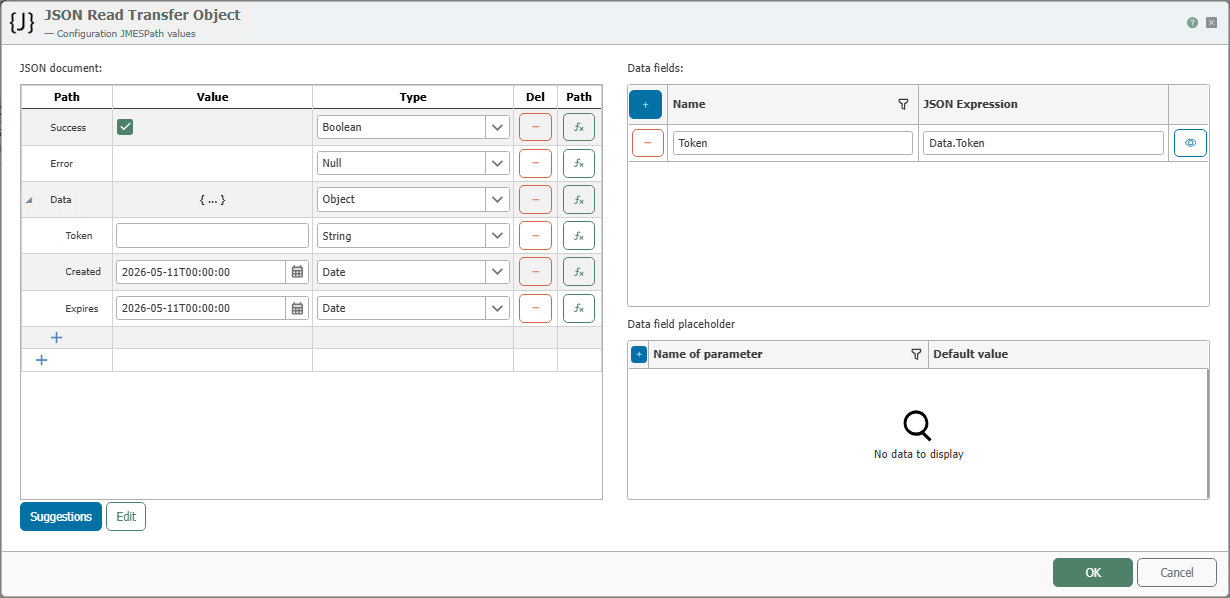
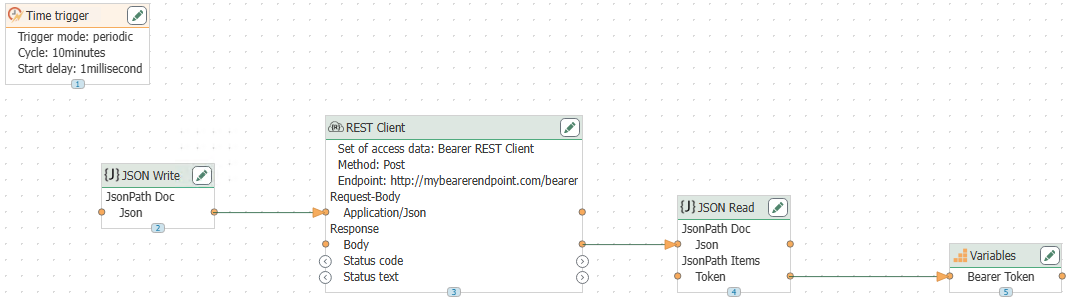
Next, create a variable (untyped) in which the response from the token endpoint is initially stored in its entirety. To do this, connect the response’s body parameter to this variable.
Then, use a JSON Read Transfer Object to read at least the access_token value from this response. If the target system also returns values such as token_type, expires_in, or refresh_token, you can also read these and use them further.
If the token needs to be renewed regularly, integrate a time trigger and set the interval so that the request is executed again before the token expires.
In the end, our example connection looks like this:
Passing the Token
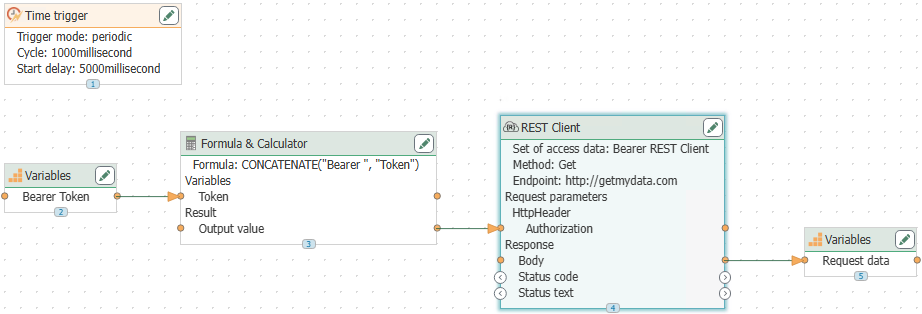
In a second connection, pass the previously retrieved token to another REST call.
- Drag the variable containing the stored token response onto the workspace.
- Add a JSON Read transfer object and read at least the
access_tokenvalue from it. - If necessary, also read
token_type. If the target system does not return a type, generally useBearer. - Create a Formula and Calculator transfer object and select the
CONCATENATEfunction viaMore. Combine the header value fromtoken_type, a space, andaccess_token. If the type is not provided dynamically, you can instead concatenate the fixed prefixBearerwith theaccess_token.
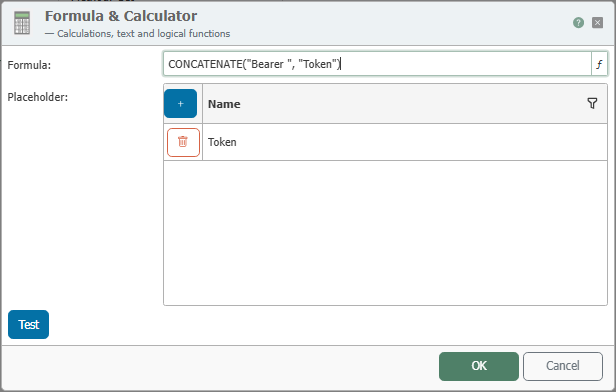
Connect the output values of the JSON Read transfer object to the inputs of the Formula and Calculator transfer object.
Next, design another REST client transfer object:
- Select a method such as
GETto retrieve your actual data. - Select the
application/jsonformat for the request. - Create a request parameter of type
HTTP Header. - Enter
Authorizationas the header name. - Link the output value of the formula and calculator transfer object to this request parameter.
- Then link the body parameter of the response to the desired target object.
- If the call is to be made cyclically, integrate a time trigger.
Sample Project for Import
The complete sample project is available as rest_bearer_token_and_production_data_example.rpe.
The project file contains the Bearer token configuration shown, as well as the two REST trigger connections from the example Providing Simulated Production Data via REST Triggers.
Import this project file into the OPC Router to fully replicate the example and test it directly.