Connection with a bearer token
This example shows how a bearer token is first retrieved via a REST call and then used in a second connection for additional REST calls.
The underlying OAuth 2.0 fundamentals (roles, terminology, and flows) are described in OAuth 2.0 – Fundamentals.
Retrieve token
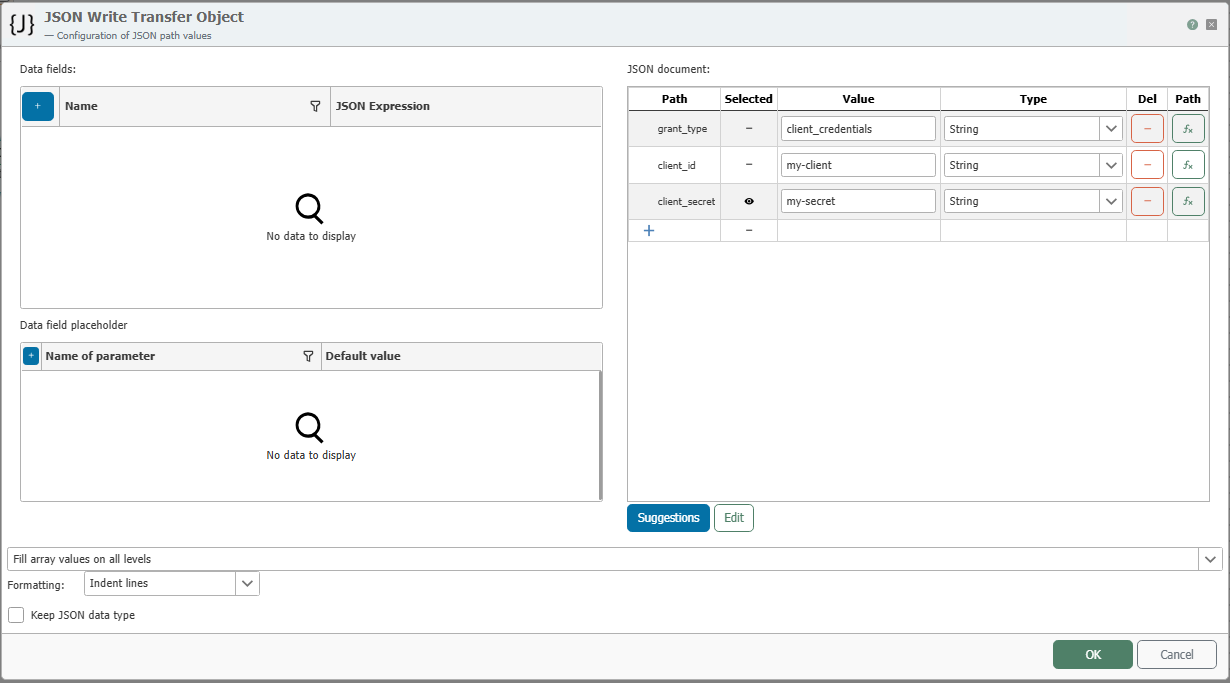
First, create the input values required for the token request. The parameters required depend on the target system. Typical examples include client_id, client_secret, scope, username, password, or grant_type.
Many OAuth 2.0 token endpoints expect a POST request for this purpose. The format application/x-www-form-urlencoded or application/json is often used. In our example, we use application/json.
To do this, follow these steps:
- Click the "
Edit" button to insert the default JSON structure for the token query. Then click "Edit" again to apply the content. In our example, the token query structure looks like this:
{
  "grant_type": "client_credentials",
  "client_id": "my-client",
  "client_secret": "my-secret",
  "scope": "api.read"
}
- In the "
Value" value column, enter the value for "client_id". The "client_secret" does not belong in the engineering configuration: To set it, create a variable of type "Secret String" and set the value via the password dialog. In the JSON write transfer object, create a data field forclient_secretand establish a connection between the variable and the data field—the value of the data field will override the placeholder stored in the JSON at runtime. For instructions on how to create such a variable, see Secrets .
Then configure a connection using a [ REST client transfer object ](../rest_transfer_object.md):
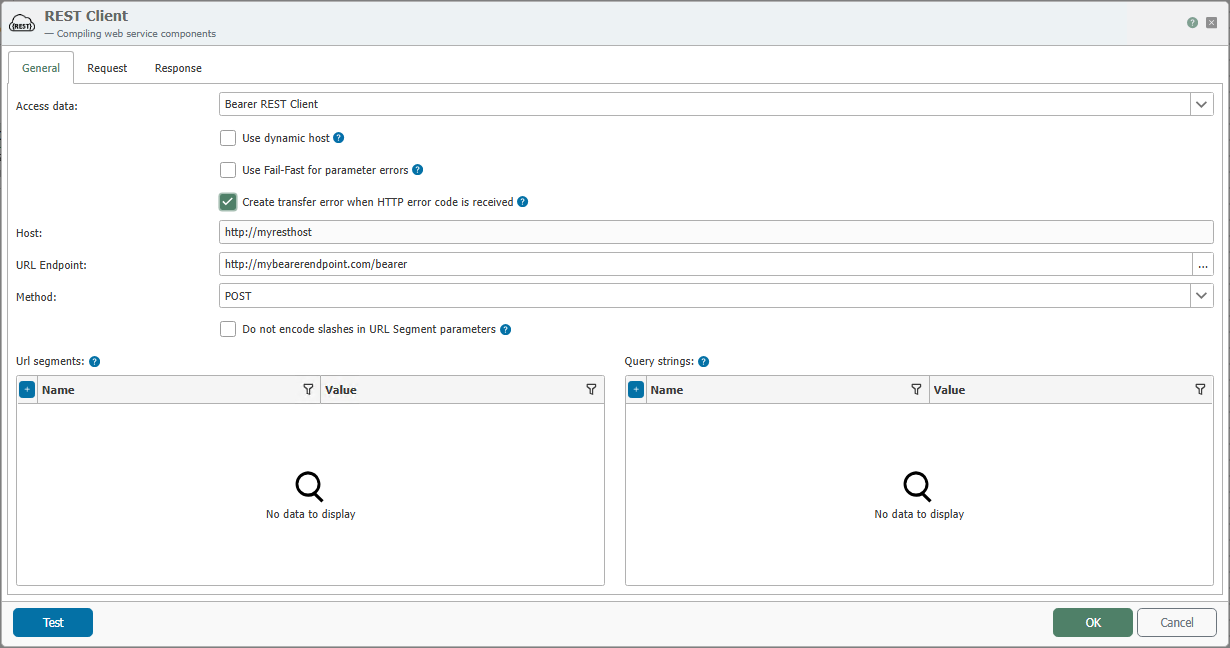
- Select the appropriate REST client connection.
- In the REST connection, set the authentication to “None” if the token is requested via the request itself and no HTTP authentication is required.
- Enter the required URL endpoint.
- Select "
POST" as the HTTP method. - On the "
Request" tab, select the format expected by the token endpoint. In our example, the endpoint isBody type = rawand the format isapplication/json. - Pass the required values by establishing a connection between the JSON parameter of the JSON Write transfer object and the request body.
Now we still need the JSON read transfer object:
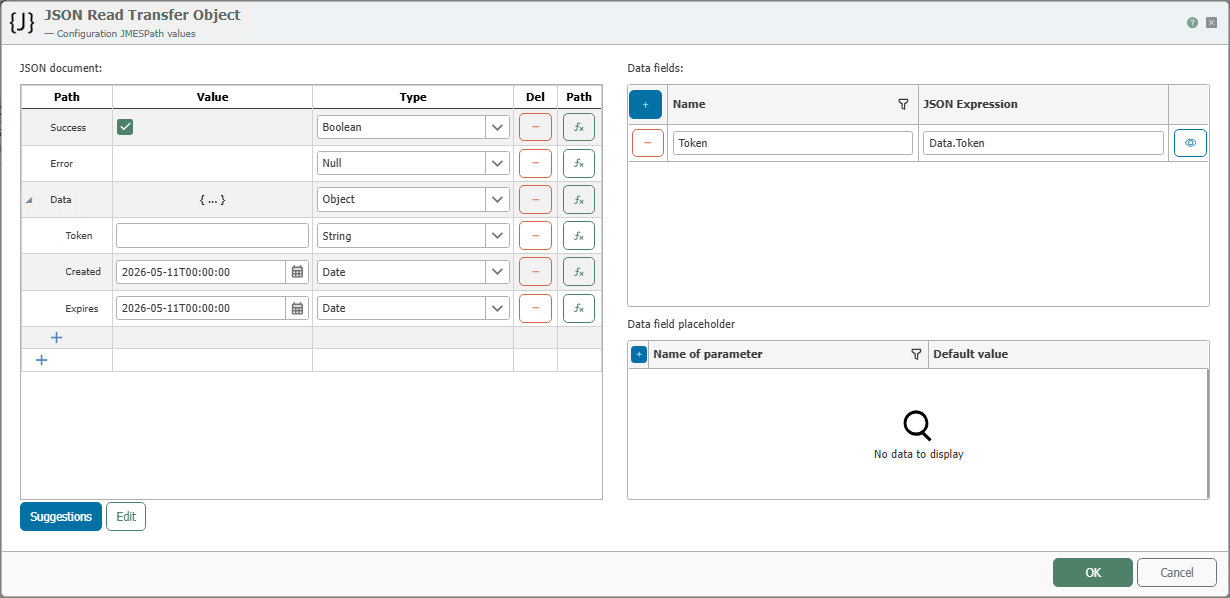
Next, create a variable of type Secret String, in which the token endpoint’s response is initially stored in its entirety. To do this, connect the Body parameter of the response to this variable; the target type makes the value a secret—see What remains masked .
Next, use a JSON read transfer object to extract at least the value access_token from this response. If the target system also returns values such as token_type, expires_in, or refresh_token, you can extract and reuse these as well.
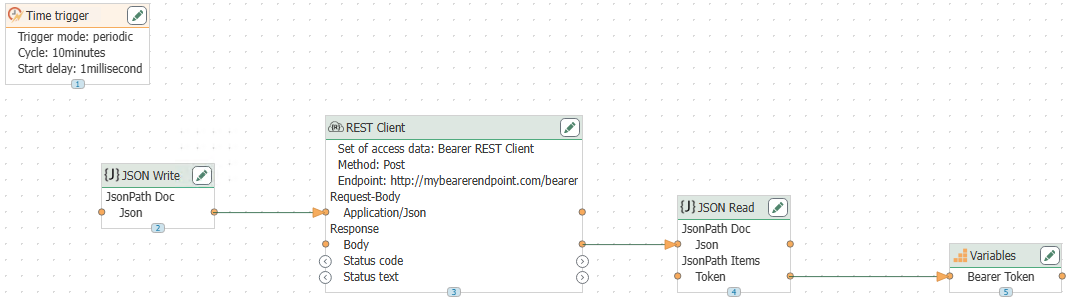
If the token needs to be renewed regularly, implement a time-based trigger and set the interval so that the request is executed again before the token expires.
In the end, our sample connection looks like this:
Pass token
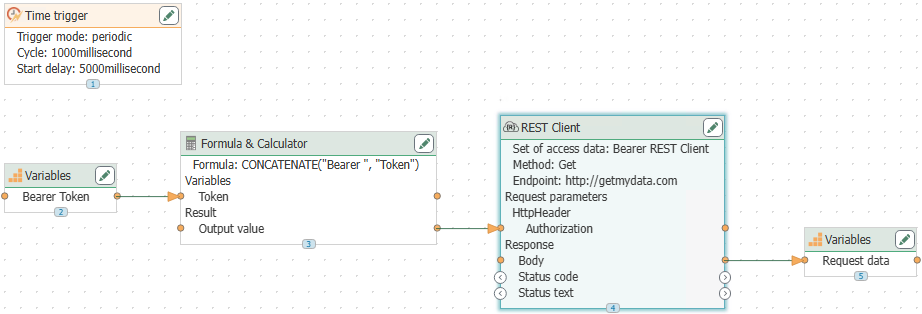
In a second connection, pass the token you retrieved earlier to another REST call.
- Drag the variable containing the stored token response onto the workspace.
- Add a JSON Read transfer object and read at least the value
access_tokenfrom it. - If necessary, also read
token_type. If the target system does not return a type, generally useBearer. - Create a formula and calculator transfer object and select the function
CONCATENATEvia “Further”. Combine the header value fromtoken_type, a space, andaccess_token. If the type is not supplied dynamically, you can instead link the fixed prefixBearerto theaccess_token.
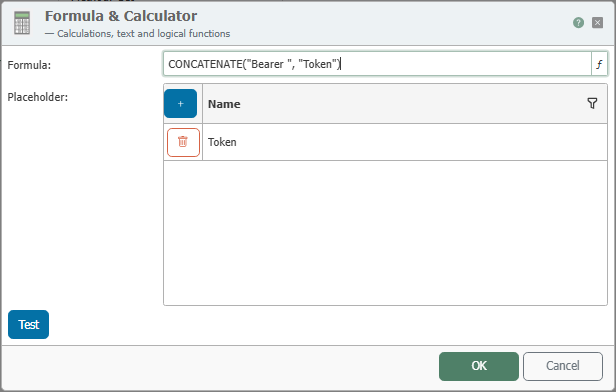
Make a connection between the output values of the JSON Read transfer object and the inputs of the Formula and Calculator transfer object.
Then configure another REST client transfer object:
- For example, select the method
GETto query your actual data. - Select the format
application/jsonfor the query. - Create a query parameter of type
HTTP-Header. - Enter
Authorizationas the header name. - Link the output value of the formula and calculator transfer object to this request parameter.
- Then link the body parameter of the response to the desired target object.
- If the call is to be performed cyclically, include a time trigger.
What Remains Hidden
Masking depends on the type of the variable, not on its value:
| Display | |
|---|---|
Variable list, transfer monitoring, and status of a Secret String variable | masked |
Connection line that writes to a Secret String variable | masked |
| Outputs of transfer objects that evaluate or compose the value | Plain text |
Every transfer object that further processes the value—in this case, the JSON Read, Formula, and Calculator transfer objects—outputs plain text. The final header value Bearer <access_token> is therefore readable in transfer monitoring. If a secret only needs to be compared and not concatenated, use the [ conditional (IF) transfer object ](../../../additional_functions/unterablaeufe/condition_transfer_object.md): It keeps the value masked and outputs only the result of the condition.
Sample Project for Import
The complete sample project is available as rest_bearer_token_and_production_data_example.rpe.
The project file contains the Bearer token configuration shown here, as well as the two REST trigger connections from the example “: Providing Simulated Production Data via REST Triggers” .
Import this project file into the OPC Router to fully replicate the example and test it immediately. The project file contains the credentials as plain values; after importing, store them as Secret String variables as described above.