Create a single instance
An instance allows you to create a specific flow from a template. This is the best approach if you only need to create a few flows or want to enter the values directly in the dialog.
If you want to create many instances at once, use Create Instances from File instead. For automated runtime scenarios, use Create Dynamic Instances.
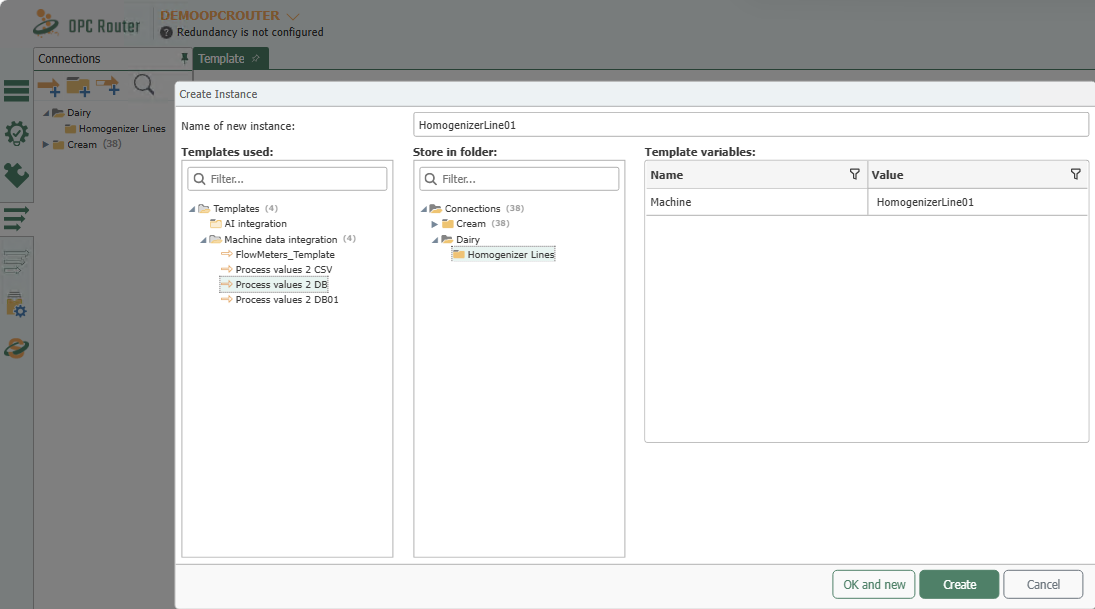
Create a Single Instance
- In the snap-in “Templates” or “Flows”, select the drop-down button
 .
. - Select “Create a Single Instance...”.
- Assign a name to the flow, for example, “HomogenizerLine01.”
- Select the desired template.
- Select the desired location.
- Enter the values for the template variables.
The template from Creating Templates contains exactly one template variable Machine; in this example, we enter the value HomogenizerLine01. You do not change the content or structure of the flow itself in this dialog—you only assign values to the template variables.
For template variables of the type TimeOffset—for example, the cycle of a time trigger—include the unit in the value: 500ms, 30s, 1h. Acceptable formats: [ for time values in template variables ](generate_instances_from_file.md#zeitangaben-in-vorlagenvariablen).
- Confirm by clicking “Create” or select “OK and new” to create the next instance immediately.
- Repeat the process for additional values, such as for Homogenizers 2, 3, 4, and 5.
- Put the instances into production.
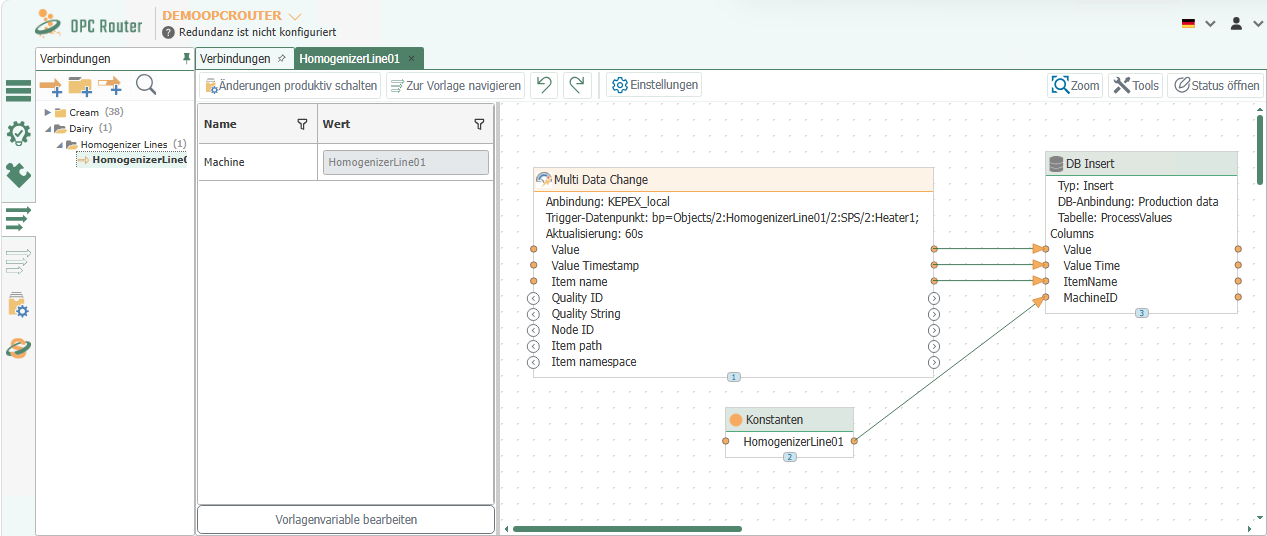
Subsequent Changes to Instances
The values of an instance’s template variables are displayed in the open flow to the left of the design area in a grid with the columns “Name” and “Value”; the name appears there in curly braces, just as it appears in the template fields. The grid is read-only when opened. Only the “Edit template variables” button below the grid unlocks the value column; it is then labeled “Finish edit template variables” and locks the editing again with the next click. The changed values take effect after the instance goes live.
To switch to an instance’s template, use the flow toolbar: Only for instances is there a button with the template icon and no label; its tooltip reads “Navigate to template”.” Clicking it opens the corresponding template in the “Templates” snap-in.
If you change the template later, all instances will be updated accordingly; for information on what happens to the values of their variables, see Changing a Template When Instances Already Exist . The instances must then be put back into production.
If a template is already selected and you choose “New instance”,” you’ll immediately see the template and its associated template variables.